


Introduction
Raspberry Pi's are versatile, compact computer boards brimming with endless possibilities. From home lab projects to honing coding skills and managing smart home devices, Raspberry Pi offers a low-cost entry point into the world of DIY innovation. Raspberry Pi's can function as a web or storage server, allow you to experiment with Docker or Kubernetes, or even build a media hub. Raspberry Pi's serves as the ultimate playground for tech enthusiasts.
My journey into the realm of home labs began with a few Raspberry Pi 3's, and has since evolved to include multiple Pi 4s and refurbished laptops powering my environment. Through hands-on experimentation, I've expanded my skillset, hosting my own services, developing websites, and managing equipment for others.
In this comprehensive guide, we'll delve into the setup process for a Raspberry Pi computer, covering everything from initial configurations to enhancing security with firewalls. Whether you're a beginner looking to kickstart your home lab journey or a seasoned enthusiast seeking to explore new projects, join us as we unlock the full potential of Raspberry Pi and its myriad applications.
Prerequisites
- Raspberry Pi
- Internet Connection
- SD Card with Reader
- Raspberry Pi Imager
- Compatible OS
Image an SD Card
Using the Raspberry Pi Imager, you can download any compatible OS and configure it to your needs. Previously there was a default login and you needed to add files to the card to enable SSH or Wi-Fi. You don't have to do that now.
Grab your SD card and pop it into your computer, then open up the Imager, and let's get started.
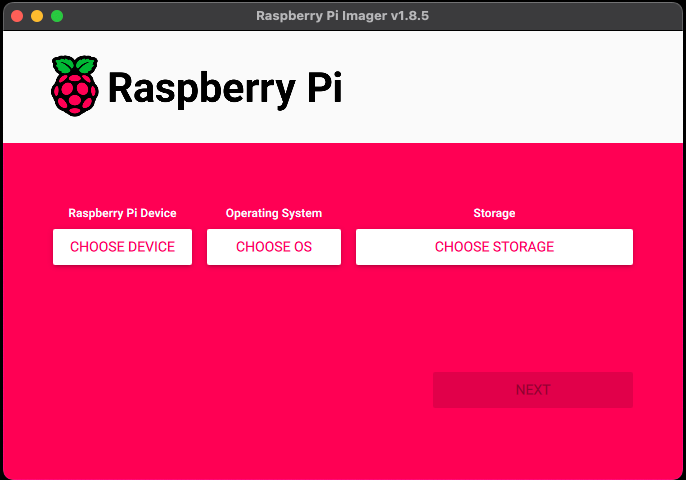
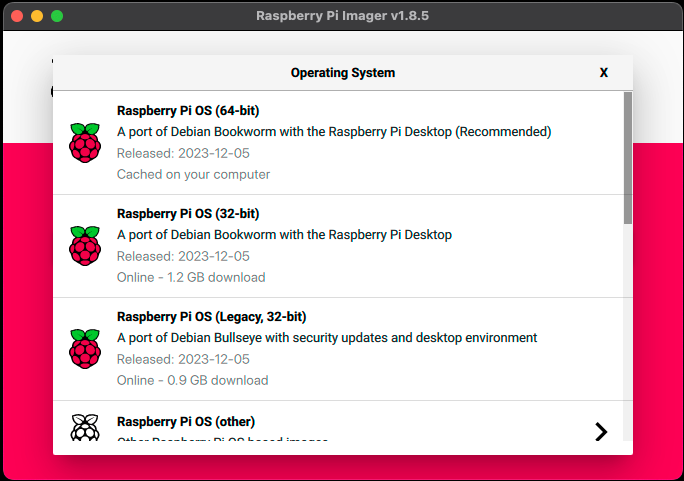
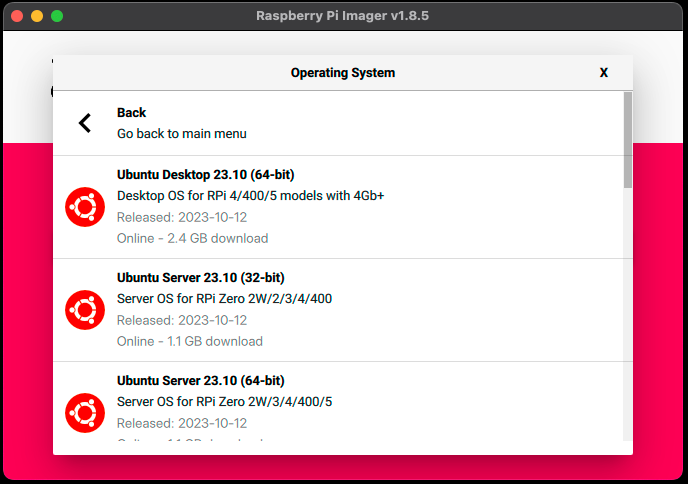
You can pick between a wide range of Operating Systems, the big thing I like is that you can install Ubuntu easily if you do not want to use Raspberry Pi OS.
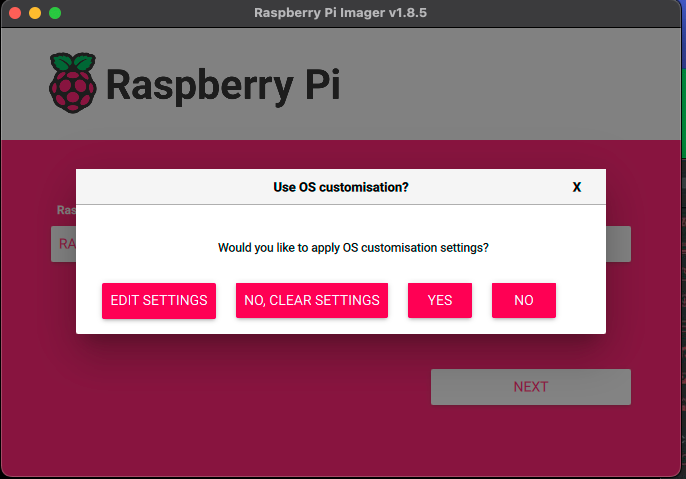
When you click next, you can configure an account, the hostname, timezone, and internet settings.
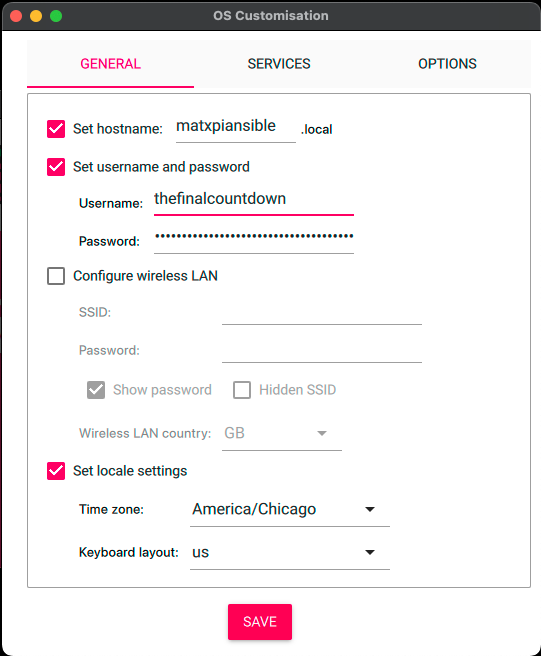
After you set your settings, you will need to confirm the installation and it will take a minute or two to write to the card.
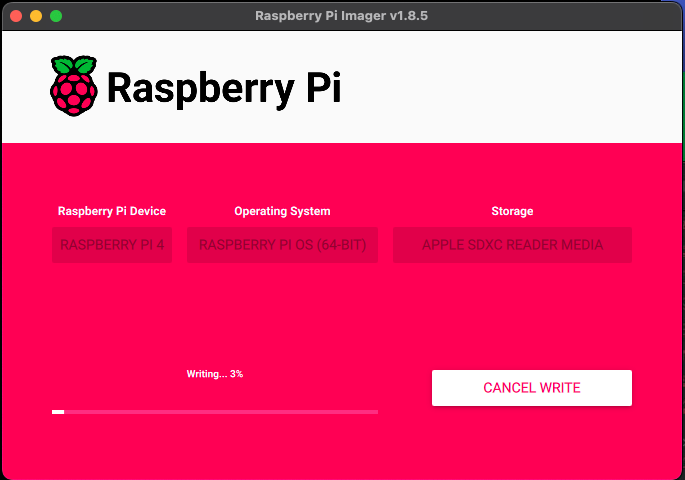
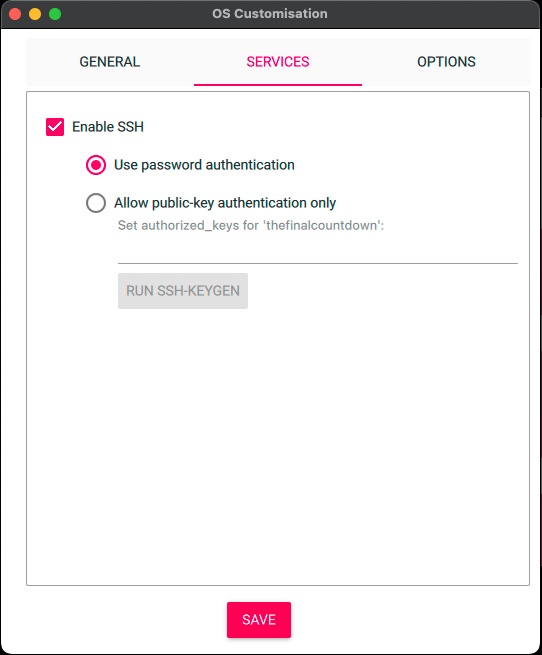
After it is written, you can remove the SD card from your machine and pop it in your Pi. After powering on the Pi, it can take up to 5 minutes for the Pi to initialize on the first boot. After it boots you can connect to it via ssh using either the hostname or IP address and the password you pre-programed.
ssh thefinalcountdown@192.168.1.25
# enter password
Static IP
The nice thing about Raspberry Pi OS is that there are built-in menus to configure the Pi without needing to know the command line, which is perfect for beginners. Now if you plan on using this Pi for dedicated services, I recommend setting a static IP address using the nmtui menu.
sudo nmtui
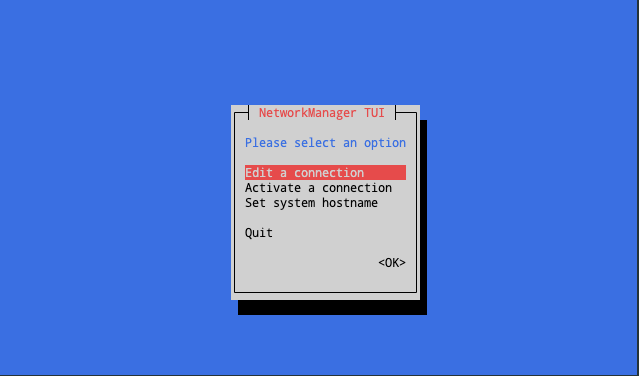


After you set your settings, you will need to reboot the PI using sudo reboot. When it comes back up it should be on the new IP.
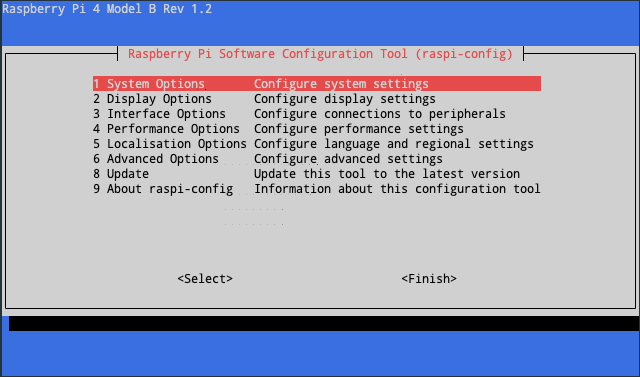
Raspi-Config
Run sudo raspi-config to launch a configuration tool that allows you to customize your Raspberry Pi.
Options include but are not limited to:
- System Options
- Hostname
- Localization Options
- Timezone
- WLAN Country (typically not needed unless you are using wireless)
- Advanced Options
- Expand File System (useful when you have an SD card larger than 64GB)
Afterwards, you will need to use sudo reboot to reboot the system for the settings to take effect. Then log in again after reboot.
Secure the Pi
We need to add a user and then force the user who is granted sudo access to use a password. To do so follow the commands below. Swap out [username] for your username. Then let's change the default password for root. Use a random password generator for more effectiveness. Reboot the machine and log in as the new user you created.
sudo adduser username
sudo adduser username sudo
sudo passwd root
sudo passwd --lock username
sudo reboot
Enable Firewall
By default, there is no firewall config. UFW (uncomplicated firewall) is a configuration tool that comes with most OSs by default. In our case, it's not installed. This works with iptables and makes it easy to manage.
sudo apt update
sudo apt install ufw -y
The idea is to secure your system and allow only what you want. Setting the default rules to deny comes in handy. However, this can have a large impact if you don't have the basics pre-configured before you enable the firewall. Now the Ubuntu community page has some very helpful documentation on how to use the firewall configurations. I am going to go over some basics and essentials to get started.
It is best to either allow connections from your ethernet interface (which you can find using ifconfig) or the IP CIDR range like 192.168.1.0/24. Additionally, you want to add your SSH port 22 so that you can stay connected to the server. If you are running a web server or a DNS server, you will need to allow those ports. Below are some basic commands to get you started. I suggest you look over the community wiki.
sudo ufw default deny
sudo ufw allow in on eth0
sudo ufw allow out on eth0
sudo ufw allow in from 192.168.1.0/24
sudo ufw allow 22
When you are ready, you can enable the firewall by using the following command: sudo ufw enable and you will get a warning. This warning will tell you that it can disrupt any active connections. As long as you have set the ports, you should be fine. To disable the firewall, you can use sudo ufw disable it at any time.
Extras
As an added bonus, you can use sudo raspi-config it to adjust settings on the Raspberry Pi.
Increasing Swap Memory
Swap memory is virtual memory (RAM) which stores memory data on the disk. This is definitely a slower solution when physical memory (RAM) is full. Swapping is a term that means RAM and virtual RAM swap data for data that is stored in RAM that doesn't need to be at the forefront and accessed directly. Computers will typically offload some data to make space when it's not actively being used, but still needs to be saved. The term is called paging in, similar to Windows and the Page File.
One of the things that I have noticed when running a DNS server, or anything that could potentially use up a lot of RAM is that the swap memory gets filled rather quickly. Now on Pi's that have 4GB or more RAM do not seem to have this problem as much. The fix is rather easy and it involves modifying a file and rebooting.
Disable Swap
Before we can go modifying the swap file or increase it, we need to tell the system to stop using it temporarily.
sudo dphys-swapfile swapoff
Modify Swap File
To modify the swap file, we need to open it up using nano. In this file we want to change CONF_SWAPSIZE=100 from 100 megabytes to something more manageable. You have to use the numerical values in megabytes, but something like 1024 (1 gigabyte) should work in this case. You can increase it if needed.
sudo nano /etc/dphys-swapfile
Find CONF_SWAPSIZE=100 and change it to CONF_SWAPSIZE=1024 then use Control+O to save and Control+X to exit.
Re-initialize Swap
Running the following command will delete the original swap file and information to replace it with what we wanted.
sudo dphys-swapfile setup
Enable Swap
After we rebuild and re-initialize the swap files, we need to enable it and reboot the system for the changes to take effect and be recognized by the system and applications.
sudo dphys-swapfile swapon
sudo reboot
Potential Projects
Before we conclude our setup guide, it wouldn't be fair to not include some start projects to get going.
- Media Server with Plex or Jellyfin
- Docker (check out my guide)
- DNS Server like PiHole or AdGuard Home (posts coming soon)
Conclusion
Raspberry Pi's, and other small computer boards, stand as a beacon of innovation and creativity. They offer levels of an unparalleled platform for exploration, experimentation, and adventure whether you are new or an avid enthusiast.
As this article concludes, I encourage you to embrace the endless possibilities that await. I believe that Raspberry Pi and other small computers offer a world of opportunities that are low cost, low energy requirements, and minimal maintenance. I hope you continue to unleash your creativity, sharpen your skills, and embark on exciting new adventures. Your home lab experience is waiting for you.
Full Disclosure
Most of this article is comprised of facts and opinions. The featured background image was created by andyoneru and is available on Unsplash. I added a blur and a gradient overlay with some text. The following images have been pulled or screenshotted from the respective websites/applications. I do not own this content.